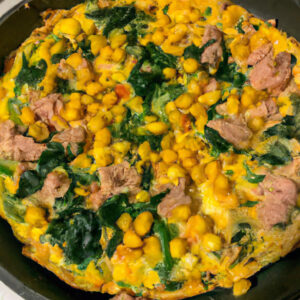
Tuna, corn and spinach frittata
Summary
Dive into the world of delightful homemade dishes with our Tuna, corn and spinach frittata! Perfect for a wholesome meal, it’s the go-to dish that promises an exquisite burst of flavors. Fresh ingredients, a sprinkle of dedication, and the aroma that’ll leave your kitchen smelling like a gourmet restaurant – let’s get into the details!
Ingredients
- Tuna (canned) – 1 cup (237 ml)
- Corn kernels – ½ cup (118 ml)
- Fresh spinach leaves, chopped – 2 cups (474 ml)
- Large eggs – 6
- Olive oil – 2 tablespoons (30 ml)
- Salt – ½ teaspoon (2.5 ml)
- Black pepper, freshly ground – ¼ teaspoon (1.25 ml)
- Red bell pepper, finely chopped – 1/2 cup (118 ml)
- Onion, finely diced – ½ cup (118 ml)
- Garlic cloves, minced – 2
- Grated cheese (your choice, optional) – ½ cup (118 ml)
Preparation and Cooking Time: 40 minutes
Serves: 4
Nutritional Facts (per serving)
- Calories: 310
- Protein: 25g
- Fat: 18g
- Carbohydrates: 15g
- Fiber: 2g
- Sugars: 4g
Preparation Steps
- Begin by draining the Tuna and setting it aside.
- In a mixing bowl, whisk together the eggs, salt, and pepper until well combined.
- Heat olive oil in a skillet over medium heat.
- Add diced onions and garlic, sautéing until translucent.
- Introduce the red bell pepper and corn kernels. Stir for 2-3 minutes.
- Add the chopped spinach, cooking until wilted.
- Mix in the Tuna, stirring gently to evenly distribute it.
- Pour the whisked eggs over the Tuna and vegetable mixture, ensuring it covers everything evenly.
- Allow the mixture to cook for about 5-7 minutes or until the edges start to set.
- Sprinkle with cheese (if using) and transfer the skillet to a preheated oven at 375°F (190°C). Bake for 20-25 minutes or until the frittata is firm and golden.
- Remove, let it cool slightly, slice and serve!
Tips
- Fresh vegetables can be substituted with frozen ones – ensure they’re thawed and drained to avoid extra moisture.
- For a dairy-free version, omit the cheese or use a dairy-free alternative.
- Using a non-stick skillet makes the transition from stove to oven smoother.
Serving Suggestions
- Serve your Tuna, corn and spinach frittata with a fresh green salad or roasted veggies on the side.
- A dash of hot sauce or a dollop of sour cream can add an extra layer of flavor.
- A piece of crusty bread complements the soft texture of the frittata perfectly.
Still curious? Don’t forget to check out these articles on healthy breakfast.
FAQs
What type of Tuna should I use for the Tuna, corn and spinach frittata?
Preferably, use canned Tuna in water for a leaner option, but Tuna in oil can be used if drained properly.
Can I prepare this frittata in advance?
Absolutely! It tastes great the next day and can be refrigerated for up to 3 days.
Can I add other veggies to this frittata?
Certainly! Zucchini, mushrooms, and tomatoes make great additions.
How do I know when my frittata is perfectly cooked?
The edges should be golden, and the center should be set without being runny.
Can this Tuna, corn and spinach frittata be frozen?
Yes, once cooled, wrap it tightly in plastic wrap, and it can be frozen for up to a month.
How can I reheat the frozen frittata?
Thaw it overnight in the refrigerator and reheat in the oven at 325°F (165°C) until warmed through.
What cheese works best for this frittata?
You can use cheddar, mozzarella, or even feta – it’s up to your personal preference.
Is this Tuna, corn and spinach frittata keto-friendly?
Without the corn, this recipe can fit into a keto diet. You can replace the corn with another low-carb vegetable.
What’s the best way to serve this for a brunch?
Cut it into wedges and pair it with fruit salad or fresh juices for a complete brunch meal.
Can I use fresh Tuna instead of canned?
Sure, but ensure it’s finely flaked and cooked before adding it to the frittata mixture.
Expand your knowledge further with this article on healthy breakfast.

Tuna, corn and spinach frittata
Nutritions
Ingredients
- * Tuna canned – 1 cup (237 ml)
- * Corn kernels – ½ cup 118 ml
- * Fresh spinach leaves chopped – 2 cups (474 ml)
- * Large eggs – 6
- * Olive oil – 2 tablespoons 30 ml
- * Salt – ½ teaspoon 2.5 ml
- * Black pepper freshly ground – ¼ teaspoon (1.25 ml)
- * Red bell pepper finely chopped – 1/2 cup (118 ml)
- * Onion finely diced – ½ cup (118 ml)
- * Garlic cloves minced – 2
- * Grated cheese your choice, optional – ½ cup (118 ml)
Instructions
- Begin by draining the Tuna and setting it aside.
- In a mixing bowl, whisk together the eggs, salt, and pepper until well combined.
- Heat olive oil in a skillet over medium heat.
- Add diced onions and garlic, sautéing until translucent.
- Introduce the red bell pepper and corn kernels. Stir for 2-3 minutes.
- Add the chopped spinach, cooking until wilted.
- Mix in the Tuna, stirring gently to evenly distribute it.
- Pour the whisked eggs over the Tuna and vegetable mixture, ensuring it covers everything evenly.
- Allow the mixture to cook for about 5-7 minutes or until the edges start to set.
- Sprinkle with cheese (if using) and transfer the skillet to a preheated oven at 375°F (190°C). Bake for 20-25 minutes or until the frittata is firm and golden.
- Remove, let it cool slightly, slice and serve!
Notes
2. For a dairy-free version, omit the cheese or use a dairy-free alternative.
3. Using a non-stick skillet makes the transition from stove to oven smoother.


Leave a Reply